Paper Character Setup & Movement

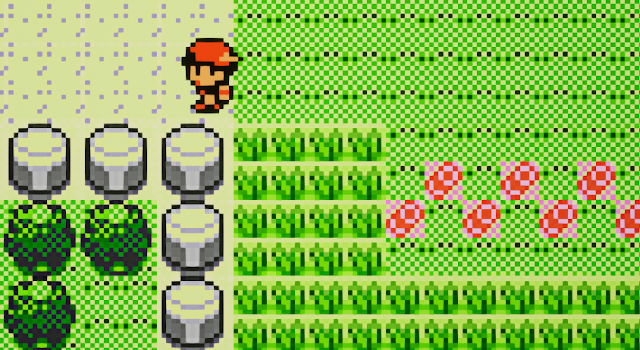
Alright, let's keep going. We left off with a little world of our own—our sandbox tile map—and extracted sprites in preparation of our Hero. But we didn't make him yet. Feel free to choose your own sprites for your own Hero or Heroine. I'll be using good ol' "Ethan" from Pokémon Gold/Silver to keep the theme going.
For animation, we need to create something called a Flipbook. Think of this as when you doodle in the corner of a book, or on some notecards, and then you flip the pages and it makes them animated. It's the same concept, except we're using those sprites.
We'll need two different states of Flipbooks: movement and idle states. Let's begin with movement.
The Wonderful World of Animation
| Left movement. |
These sprites have two images for movement. You can see above I've selected the two left facing ones. Right click the sprites and at the top of the menu click "Create Flipbook." Name the newly created file with your naming convention. As you can see my sprites are prefixed with an "S_" to stick with my convention. I'll be naming my Flipbooks with an "FB_" prefix. I've also added the color in there and the direction, just to give it further description.
 |
| First steps. |
Double click the new Flipbook file and you'll be presented with a screen similar to the above image. Down below you'll see the two sprites you've selected to alternate back and forth between. You can pause that timeline if it's making you sick. I turned the speed down to 4.0 on the right side. That felt about right for that old school animation speed.
I swapped my two sprites also. Click and drag to move your sprites in the timeline. I wanted the first thing to happen as soon as a button is clicked is for the foot to lift. If you rapidly tap the Left movement key with the sprites in the other order you'll have a gliding Hero that never lifts his foot because the animation doesn't make it to the next frame before the key is released.
That's it. Do it for all your other directions. If you're using the same sprites as me, you'll note there are no right-facing sprites. We'll return to that in a bit.
You should now have movement Flipbooks for Up, Down, and Left (and Right if you're using different sprites that have it). We now need idle Flipbooks. Just repeat this process, but make Flipbooks with only the standing sprites. Set the animation speed to 0. Now you've made a Flipbook with a single frame.
Some games have idle animations, I should note, where they breathe and bounce and move around a little as they stand still. This is old school, though, where everything is just static and still, so we only have that single motionless frame.
I Need a Hero
Now that we have all our Flipbooks prepared, let's make the actual Hero. Right click in your content browser and select "Blueprint Class" to bring up the Blueprint selection menu.
 |
| Making the PaperCharacter Class. |
Under "All Classes" use the search bar and type in "Paper" to find the PaperCharacter class. This is what we want to use. It has all the necessary components and goodies to make our Hero.
Open up your new Blueprint (and name it; I use "BP_" as the prefix for my Blueprints). Select the "Sprite (Inherited)" in the Components tab to bring up the associated Details for it. Under the Sprite tab of the Details panel, find "Source Flipbook" and set that to your idle downward facing Flipbook (or whatever you want the default image to be).
| Default sprite. |
Now you should be able to see your fresh 2D Hero appear in the Viewport. Looking good! That's a pretty humongous Capsule around him though. Change the Shape settings to something like Capsule Half Height of 7 and Capsule Radius of 7. Then move the Sprite down the Z axis a bit to put his feet at the bottom of the little sphere. That Capsule Component is the collision for our Hero.
Time for Your Closeup
Next we need to add a Camera. This is what the player will see through. This becomes their screen.
We want to first add something called a Spring Arm. Click "Add Component" and search for it. Next, "Add Component" again and search for Camera. Click and drag the Camera onto the Spring Arm to make it a child of that component, if it's not already. The Spring Arm is like a long pole that sets the Camera out at a distance from whatever it's looking at.
By default this Spring Arm and Camera are looking at our Hero's profile. With the Spring Arm selected, change its Rotation under the Transform settings (in the Details panel) to -90 degrees. Also change the Target Arm Length to 200 instead of 300 to bring the Camera in a little bit closer. You can fiddle with the Target Arm Length to whatever setting you prefer. I just liked 200.
Now the Camera should be set at a proper angle, face on, at a reasonable distance.
 |
| That's a pretty huge camera. |
There's one last setting to tweak and this time it's under the Camera, not the Spring Arm. Find "Camera Settings" in the Details and change the Projection Mode to Orthographic, and set the Ortho Width to 256 (the Width is another setting you can tweak to your liking). This will flatten the world. Kind of like South Park. Or, you know, Pokémon.
You're the One
In order to get your game to spawn this guy as your character there are some steps to take to make him the Default Pawn Class.
Right click in the content browser again and make a Blueprint Class. In the creation window choose Game Mode Base. Open it up and under the Details for the Class Defaults change the "Default Pawn Class" to whatever you named your Hero or Heroine.
 |
| Change these to your custom Blueprints over time. |
Next we need to make it so that the game uses this Game Mode instead of the built-in one.
Open up Settings for Unreal Engine, go to Project Settings, and then under the Project category click on Maps & Modes. Change the Default GameMode to be your newly created Game Mode Blueprint. Here you can also see what now will be used for your game. It will read the defaults you set in the Blueprint. Your new Hero should be listed as the Default Pawn Class. This is what the Player Start will spawn.
Go ahead and drag in a Player Start from the Place Actors > Basic tab to the left of the editor's viewer. Put it somewhere sensible on your Tile Map where you want your character to spawn. I set mine to be at -5 on the Y-Axis so that he's just underneath the top collision layer.
NOTE: If you want to change those big white balls that Unreal uses as a debug visual for Actors in the editor—and you're going to want to—the setting for that is called "Editor Billboard Scale" under the Rendering category in the details for an Actor. I drop those down quite a bit (sometimes to 0.05), as they can be really irritating and clutter up the screen when you're working on small stuff like we are. I mean our Hero is less than 10cm tall if you think about the scale here.
If you hit Play, your little guy should spawn now. Nothing happens, though, because we haven't set up movement yet.
 |
| He liiiiiives. |
Let's Get Moving
Let's get some basic movement happening now. First, we need to map some keys on our keyboard.
Open up your Project Settings again and this time go to Input under the Engine category. Under Axis Mappings add two named LeftOrRight and UpOrDown.
 |
| Axis mappings for movement. |
As you can see I've given the A key a scale of -1.0 and the D key a scale of 1.0 (same for Left and Right, which are the arrow keys on a keyboard). W is 1.0 and S is -1.0 for the UpOrDown axis. This corresponds with our X and Z axes for movement. If we're moving left, we are moving negatively on the X axis. If we're going up we are moving positively on the Z axis.
With those mapped, we have to make a few adjustments to the CharacterMovement component in our Hero's blueprint.
We need to constrain our Hero to those two axes of X and Z. We are moving in 2D space. There's no depth to this game. Select the CharacterMovement component and under the Details find the Planar Movement tab. Check the "Constrain to Plane" box. Choose Y for the "Plane Constraint Axis Setting." I also decided to "Snap to Plane at Start" to get him on the grid. Probably unnecessary, but I did it.
 |
| No depth for you. |
I also want that old school movement style of just immediate go and stop. I don't want friction or braking or any fancy walking settings that platformers have. So scroll up from the Planar Movement tab and find Character Movement (General Settings).
Change the "Default Land Movement Mode" from Walking to Flying. This will bypass all the fancy stuff that Unreal has for the Walking movement. Flying is simpler. Open that tab up and you'll see you have just a "Max Fly Speed" and a "Braking Deceleration Flying." I set mine to 50 for speed and 500 for the braking, to get an immediate hard stop. You can tweak these to whatever you want.
One final setting for preparing for movement is in the World Settings. Open those up and find the Physics tab. Check "Override World Gravity" and change the "Global Gravity Z" to 0. If you forget this, everything will fall downwards when the game starts.
Okay, that's it. Our Blueprint is ready for us to begin coding in some movement. We're going to focus on how to select proper animations next time, but if you want to get the movement happening, here are the Blueprints you'll want to hook up in your Event Graph for your Hero.
 |
| Basic movement Blueprints. |
Right click and create InputAxis nodes for UpOrDown and LeftOrRight. Since we don't want diagonal movement I've made a little quick and dirty check that blocks clicking both at the same time. Send both to a Branch node, check that the other's Axis Value is equal to 0, and if True, Add Movement Input of 1.0 Z axis for UpOrDown or 1.0 X axis for LeftOrRight. Connect the Axis Value to multiply the Movement by that scale (because remember it'll be -1 for left or down).
Once those are hooked up, hit "C" on your keyboard with all of them selected to wrap them in a nice Comment block. Give it a name—like Movement—and now you can click and drag that whole group easily for better organization.
Hit Play and you should be able to drive your Hero or Heroine around. They'll be floating of course, because we haven't set up the code for swapping Flipbooks. It's just using that Idle Down Flipbook, or whatever you set earlier as your default.
We'll get our Hero jogging for exercise next time.
- Matthew
No Deposit Bonus Casinos 2021 - Win Real Money at US
ReplyDeleteWe wooricasinos.info list 10 best 출장마사지 online mens titanium wedding bands casinos with no deposit bonuses in the US. Find the best USA no deposit bonus codes and 도레미시디 출장샵 get https://vannienailor4166blog.blogspot.com/ your free spins